
The following photos are courtesy of Geoff Smith. For more information, Geoff can be contacted via E-mail at: geoff-smith@ntlworld.com
Attached are 3 shots of the Bomb HE, Cooper 20lb. These are racked on the RAF museum's DH9. The first and second show general details of nose and tail and also show the two crutches and carrying lug and on the third shot, the arm preventing rotation of the fuze arming vane can be seen.. The shape of this arm can be discerned in the first photo and it is adjusted by a slide and thumb-screw on the front bar of the carrier. Prior to loading the fuse and vane would be fitted with a protective cap for safety.
|
|
|
|
The following photos are courtesy of Jim Schubert. For more information, Jim can be contacted via E-mail at: razonjim@centurytel.net
Here are pictures of John Alcorn's US made Cooper 20 Pound Bomb taken on Thursday March 18. It is identical with the British made bombs except for its color; the Brit bombs were a pale Khaki color and the US bombs were a "Peasoup Green", traces of which remain on John's unrestored bomb. The color bands that most Brit bombs had indicated the explosive content. On Harry Woodman's advice John applied a white and a red band to each bomb, indicating General Purpose, on his Ninak in Mespot service. The red and yellow on John's bomb are unreadable remnents of old graffiti. It has not been mentioned so far in these discussions but the bomb's after body is made of wood. The main body is cast iron - note the rust on John's example - and the fins are sheet steel. If you look closely at the photos from the Falcon Museum you can see the wood grain under the gray paint. John's has a split near the forward end of the wood that has white tape wrapped around it to keep it from coming apart. Mark's renderings seem to imply the propeller is sheet metal; it is actually cast aluminum. The bomb is 24 and 3/4 inches long overall - minus the wire loop aft of the tail and is five inches in diameter.

|
|
|
|
Knut Erik Hagen took these photos in July 2003.
|
Knut Erik Hagen took these photos in May 2004.
|
|
They were taken at the RAF Museum.
The left hand round is the Hale 10 lb bomb, showing, at the tail, the oval, wire holder. Next forward is the arming vane, then the stabilising fins. The next two are a sectioned and a complete 20 lb bomb. The arrangement is the same as the 10 lb but visible on the sectioned example are the suspension lug and the hole for the safety pin. This is 2/3 distance forward from the back end of the fins. At top right are several flechettes, while below them is an unidentified bomb which dates from the '20s.
|
The Museum plaque identifies the contents of the show case as The Hale 10, 16, & 20 Lb bombs, Flechettes, and the last as an Artillery Shell bomb.
The other photo is a 20Lb Hales in the IWM London.
|
|
The Museum plaque reads: "A weapon designed for use against buildings, roads, and railways after 1917 when the aircraft capable of carrying it entered service. CWR 50-45%, depending upon the type of explosive filling.

|
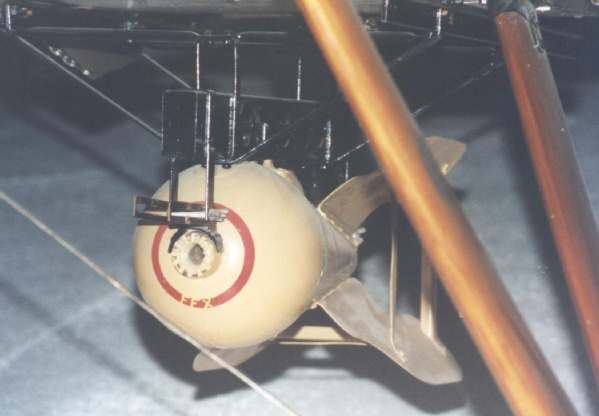
These five shots are of the Royal Laboratories 100 lb bomb, the first three shots are of it fitted to a DH 9 and the fourth is fitted to a BE 2, all carried on a centre-line rack, the design of which differs between aircraft types.
Shot 1 shows the nose of the bomb without the nose fuze which had an arming vane, hence the preventer arm fitted to the carrier. Note that the stiffeners for the fins were not present on the top of the bomb to allow suspension from the carrier.
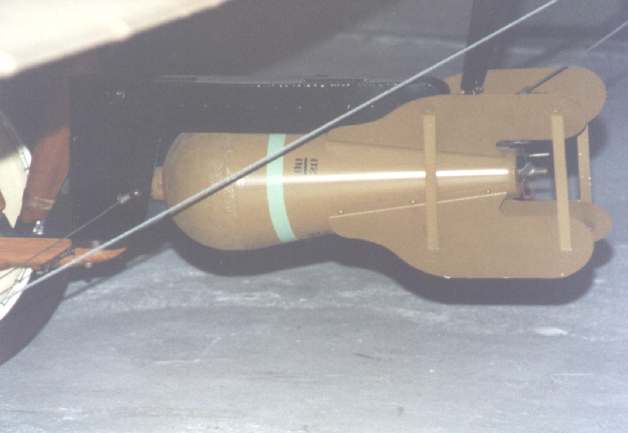
The second shot shows the carrier more clearly.
Third is a side view of the same bomb and the lightening holes and rear crutch
In the fourth shot the tail arming vane can be seen as well as the carrier which enshrouds the nose fuze on both sides, above and in front. This bomb is slightly different from the previous one in the area of the tail fuse and fin position and has only three fixing rivets per fin instead of five. This may be a different mark of the same bomb. Comments would be appreciated.
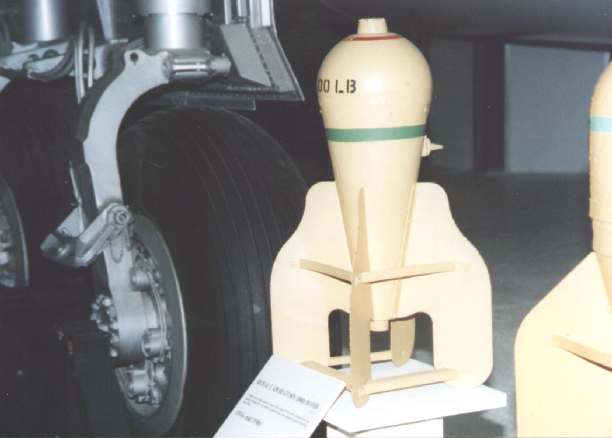
The fifth is the same mark ( ? ) as the first three photos and the profile of the suspension lug can be seen.
|
|

|
|
|
|
Photo by Knut Erik Hagen at the RAF Museum, July 2003. The Museum plaque reads: "A thick-cased, low CWR (30%) bomb, with good penetration and fragmentation but little blast. Used against buildings, railways, and reinforced structures like bridges."
|
Photo by Knut Erik Hagen , May 2004
|
|
|
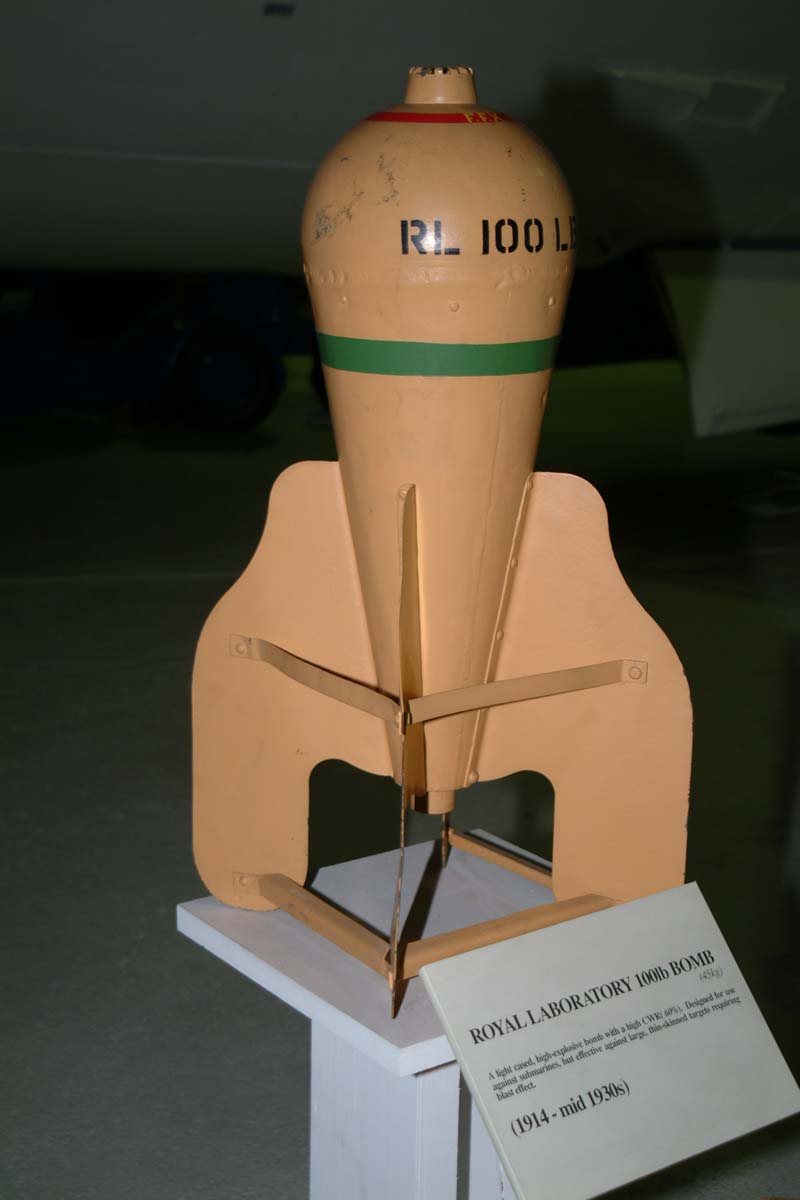
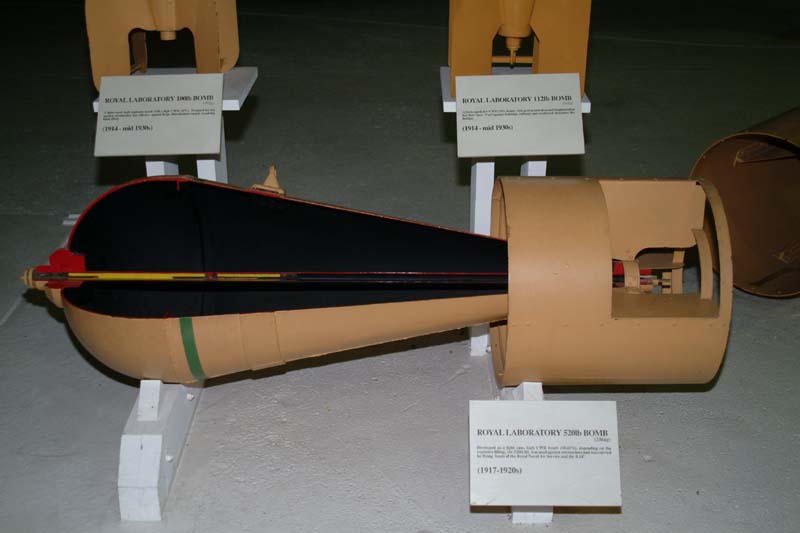
The Museum plaque reads: "Developed as a light case, high CWR bomb (50-65%), depending on the explosive filling, the 520lb RL was use against submarines and was carried by flying boats of the RNAS and the RAF."
|
The photos are taken at the IWM, London and the RAF Museum. Steve Cox tentatively identifies the first pic as a 1650 Lb bomb carried by the HP 0/400.

|

|
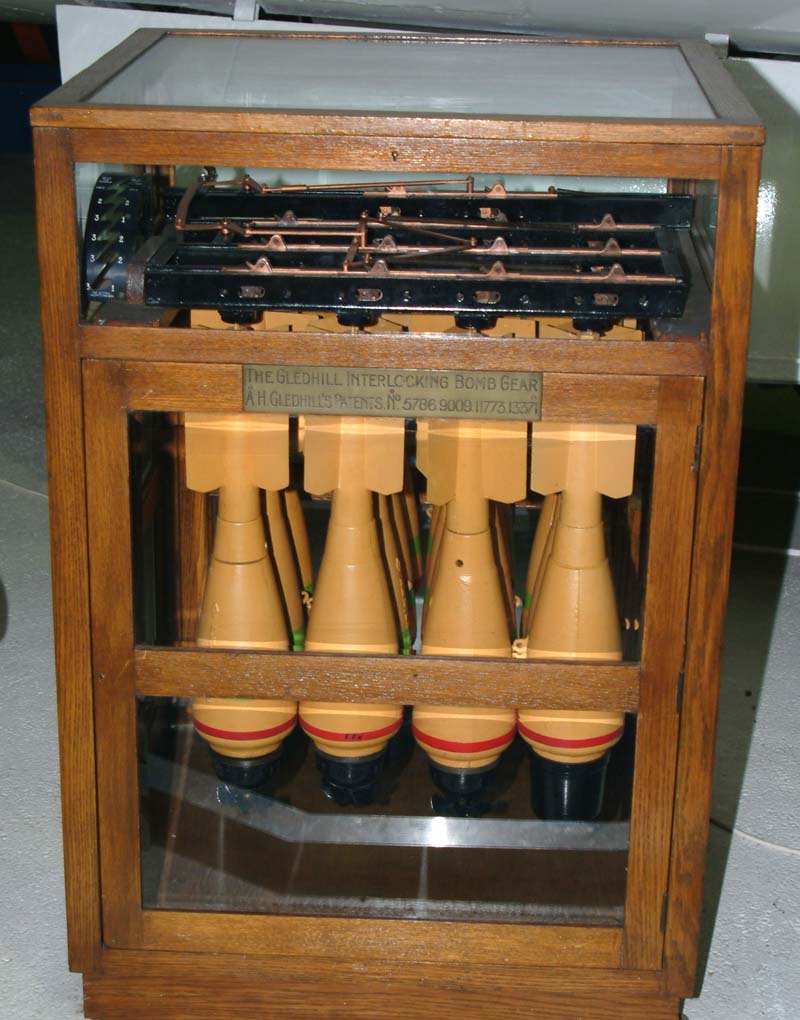
Knut Erik Hagen took these photos at the RAF Museum in July 2003. #para Gledhill Interlocking Bomb Gear
|
|
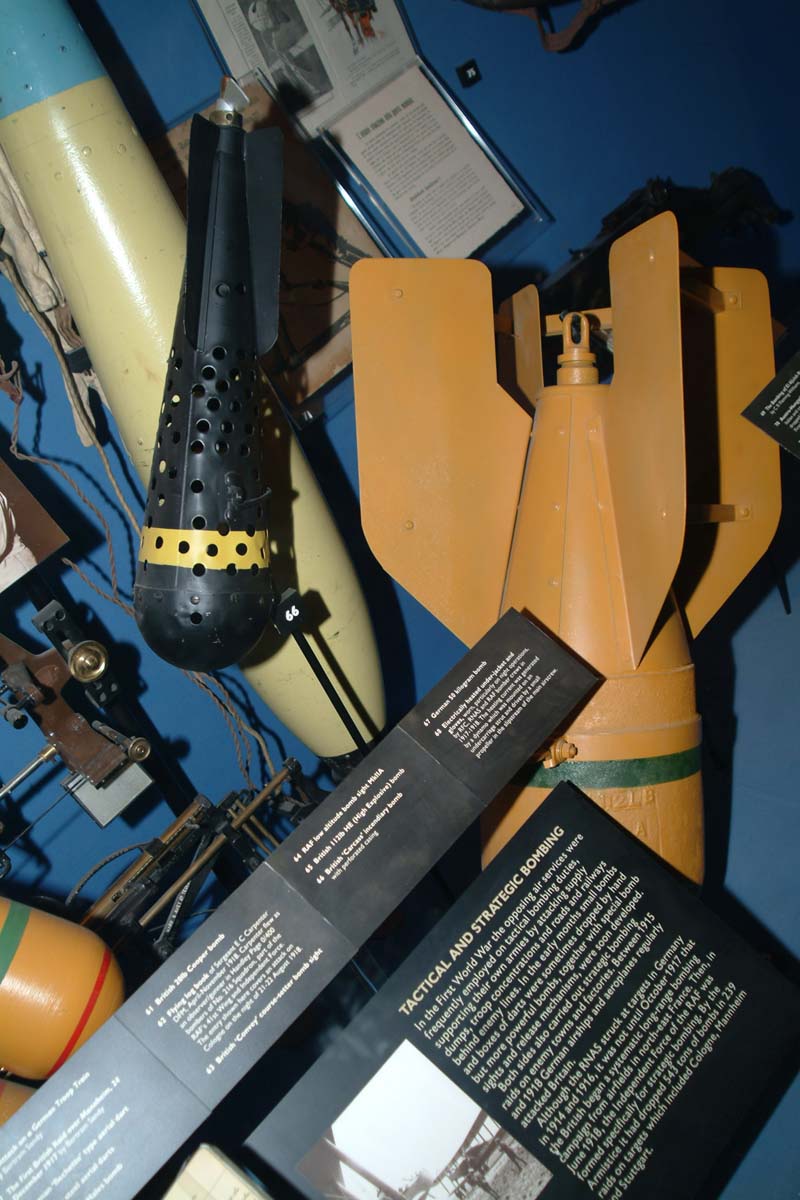
Showcase content: British 'Carcass' Incendiary bomb with perforated casing, British 112lb HE bomb, German 50Kg bomb in background.
|

|