As you can see, the top wing is on, the struts are in place, and it is
mostly rigged. These two shots show that I have a good deal of cleanup to
do on it, and alot of touch up. But it is proceeding, and should be done
some time this year.
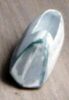
These are the bombs and bomb racks. The bombs are cast in epoxy and
microballoons. The fins and racks are styrene. I am tempted to cast 1:1
versions to drop on this fellow modeler friend of mine who keeps telling me
how impressed he is that I have made such a nice model from the Aurora
kit...
Here's a few more Gotha pics. They are self-explanatory, except to add that I have begun touching up
the lozenge. Soon I will construct my wing-fitting jig. I may actually
survive to see this thing through!
I said I'd do it and I finally am. This is a project which I have wanted to do
for some time. Except where noted, all components are scratchbuilt by Yours
Truly. Please excuse the poor photo quality - it is the last time I EVER take
a roll of film to CVS pharmacy for development!

The engines are the nice Copper State products, altered to appear as Mercedes
260hp powerplants. I have added the intake manifolds and the exhaust
suppressor from styrene tube and strip. The tubing and ductwork are solder
wire and lead-free fly-tying wire. Each cylinder has 2 ignition wires and they
go right to the distributor. I know alot of this detail is going to be hidden
in the nacelles later - boy do I know...
|
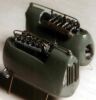
...speaking of the nacelles, here is one of them. I realize that you can't see
much detail here, but it shows that I have attained the capability to do simple
at-home vacuforming. The shape is more or less correct as far as I can tell.
Next, I will scribe in the panel lines, insert and secure the engines, add the
radiator faces and louvers, paint, and set aside for further mischeif!
|
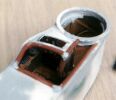
The cockpit area. I realize that it looks messy. Well, I accidentally cut
thru some bracing around the gun ring, so I'm fixing it. By the way, the
gunners ring is a thin slice of PVC pipe. The rest of the structure? Styrene.
I also added details from the indispensible Eduard WWI Instrument set and the
Fotocut set. The coaming is wire insulation. It looks oversized - I'll fix it
later. The spots where the bits of coaming intersect will be doctored up. You
will eventually see the wheel and the neat little padded pilot's seat (looks
like a miniature Barcalounger!). Unfortunately the seat pics turned out too
dark. Maybe later...
|
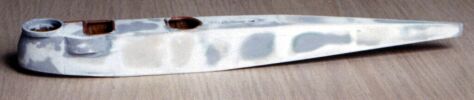
The fuselage. The port side is the interesting side because that's where the
blister for the pilot's instruments is located. I made this fuselage from a
heavier-duty styrene than I did on the first. Immediately after taking these
photos, I added the stub center section of the wing to the underside of the
fuselage. And I just realized that I fouled it up. Oh well...
|
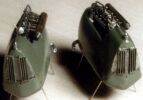
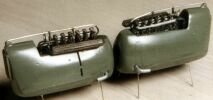
The grilles are generic detailing photoetch by Model Technologies. The
nacelles themselves were home-vac jobs, and they are sitting on little brass
wire legs. Strip styrene served for the louvers.
|

Here's the underside of the fuselage. Note the carefully crafted tunnel. Well,
I did it anyways. And the strange thing is that these parts are coming
together quite rapidly to look sort of like a Gotha. Or a HP 0/400. I guess
that it could go either way...
|
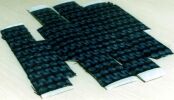
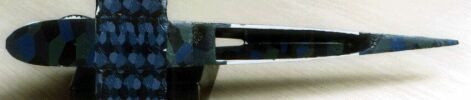
The photo of the wings gives an impression of how much loz is involved. A lot.
In fact, I have gone through 4 sheets of A/G loz already and have ordered 4
more. they are further along now, but it has been tedious and man, I HATE
those wrinkles and air bubbles!
|
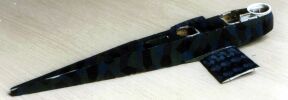
The last two pics are of the fuselage. Looks dark, don't it? It's about that
dark in real life too! It looks rough, and that is because I haven't touched
up the decals yet. I will be mixing paints to match the individual colors so
that I will be able to 'wrap-around' some of the lozenges over the corners of
the fuselage. Also, it will allow me to paint the narrow areas where it's just
too troublesome to apply the decal. Notice too that SURE, the loz decal looks
GREAT in the tunnel, but on those simple, flat exposed surfaces.... No, your
eye does not deceive - there's still alot of work left to do...
|
|