
This article originally appeared in the December 2000 issue of Internet Modeler.
 Building
Modelkrak's 1/72 Putilov-Garford WWI Armored Car
Building
Modelkrak's 1/72 Putilov-Garford WWI Armored Car
By Chris Banyai-Riepl
This has to be a first for me. You may remember me doing the inbox review of this kit last month. It was such an interesting subject, and it looked to be a fairly simple one to build, I thought I'd give it a go. Normally, with my building schedule, I was figuring on having this thing done in about three months. Instead, it only took three weeks, a shocking surprise for me. In case you missed the inbox review, I've copied the history below. Alternatively, you can click here to read the review itself, and see the parts before I started.
History
In 1914 the Putilov company started construction of a new armored car
based on the American Garford truck chassis. Weighing in at around 9 tons,
it was armed with either a 57mm or 76.2mm gun in a rear turret and three
machine guns, one in the turret and two on either side of the cab. This
vehicle was very top-heavy and could only go forward, and at a maximum
speed of 20kph. Even with these shortcomings, though, many were built.
Since it performed so poorly as a ground vehicle, many were  adapted
to rail and were employed as parts of armored trains. Rumor has it that
some survived as late as 1936 and possibly even later, taking part in
the opening exchanges of the German invasion of the Soviet Union in 1941.
adapted
to rail and were employed as parts of armored trains. Rumor has it that
some survived as late as 1936 and possibly even later, taking part in
the opening exchanges of the German invasion of the Soviet Union in 1941.
Building the Kit
After carefully reviewing the kit parts and the instructions, I pretty much knew what went where. However, there were two areas that I was confused about. The first was a little box piece. I couldn't figure out where the heck that thing went. The second concerned the rear wheels. I couldn't figure out how they attached to the kit. While I puzzled over the first part, I sent an e-mail off to a friend who had the same kit and asked him if he could help me with the second. Turns out I was missing the rear axle rod. Now that I knew what I had and what I needed, I turned to cutting resin.
 The
pour gates on this kit are fairly large, but they're manageable. I used
a razor saw to remove the ones from the turret, upper body and chassis.
Once those were off I used a piece of sandpaper glued to a board to smooth
everything down. That's one advantage to this kit: all the attachment
points for the body are flat. Once the main body and chassis were smoothed
out, I glued them together using slow-setting gel CA. This gave me time
to get everything positioned just right.
The
pour gates on this kit are fairly large, but they're manageable. I used
a razor saw to remove the ones from the turret, upper body and chassis.
Once those were off I used a piece of sandpaper glued to a board to smooth
everything down. That's one advantage to this kit: all the attachment
points for the body are flat. Once the main body and chassis were smoothed
out, I glued them together using slow-setting gel CA. This gave me time
to get everything positioned just right.
With the main body together I started looking at what needed to be done in terms of cleanup. Pictures of the Putilov-Garford cars are few and far between, so I didn't have much to go on. I did remove the resin around the rear leaf springs, as it looked out of sync with the rest of the chassis. In doing so, of course, I snapped one of the leaf springs, but that was a simple fix, just gluing it back in place. At this time I also manufactured a replacement rear axle from a piece of plastic rod. I also glued on the front axle, then prepared the wheels.
 The
wheels needed the most work out of everything in this kit. The pour gates
are thicker than what they need to be and are difficult to remove, as
they are contoured to the wheel. I used my sprue nippers and took off
small bites until I got close to the wheel, then finished it off with
some sandpaper. Once that was done I cleaned up the spokes with a knife,
then drilled holes to fit the axles into. With this done, I was ready
for paint.
The
wheels needed the most work out of everything in this kit. The pour gates
are thicker than what they need to be and are difficult to remove, as
they are contoured to the wheel. I used my sprue nippers and took off
small bites until I got close to the wheel, then finished it off with
some sandpaper. Once that was done I cleaned up the spokes with a knife,
then drilled holes to fit the axles into. With this done, I was ready
for paint.
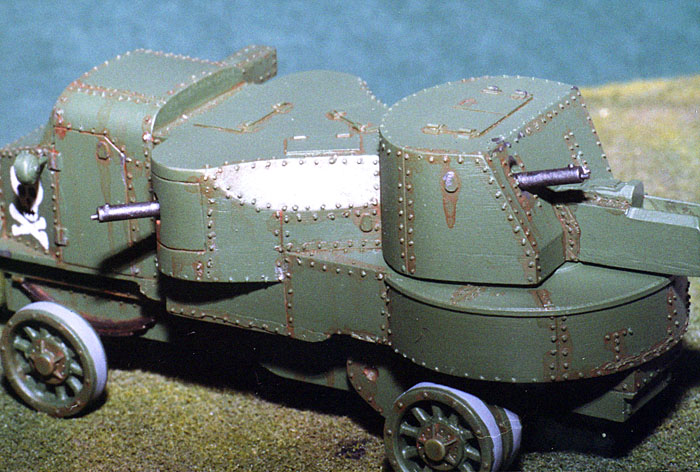
Painting and Weathering
The great thing about this kit is that no one knows for certain what colors it was painted. For all we know it could have been painted in a nice medium blue, but I decided on a green. In looking at my paint collection, I selected French Khaki, a World War Two color. It was a nice medium green that wasn't a common color and therefore wouldn't look familiar. I sprayed everything this color overall, doing several coats to make sure all the nooks and crannies were covered. Once this was done I let it dry for a couple days and then turned to the few photos I had to see if there was anything unique I could do to this thing.
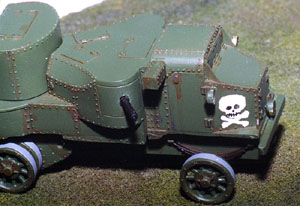
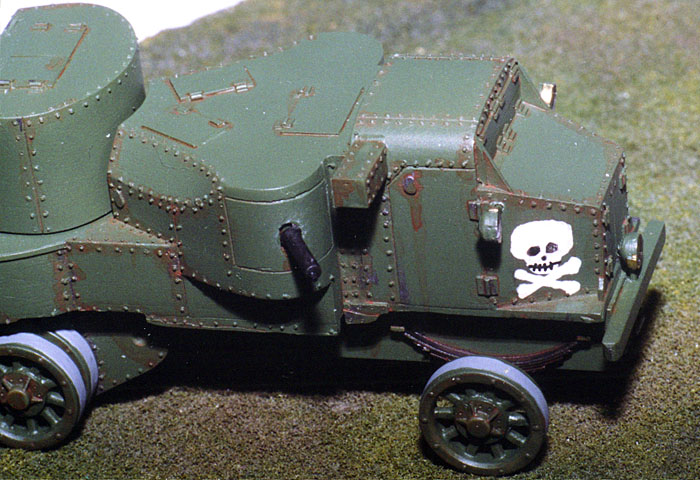
 One
of the photos I turned up showed a skull and crossbones roughly painted
on the front side panel, and this was the one I had to do. So I grabbed
some white paint and my fine brush and carefully handpainted the skull
and crossbones on. My careful painting ended up looking very much like
the rough painting on the real thing, so I'm glad I went this route instead
of making up a decal. The black parts were painted on the skull and I
then turned to the wheels. For these all I added was a band of medium
gray for the rubber boots on the wheels. With that done, it was time to
weather.
One
of the photos I turned up showed a skull and crossbones roughly painted
on the front side panel, and this was the one I had to do. So I grabbed
some white paint and my fine brush and carefully handpainted the skull
and crossbones on. My careful painting ended up looking very much like
the rough painting on the real thing, so I'm glad I went this route instead
of making up a decal. The black parts were painted on the skull and I
then turned to the wheels. For these all I added was a band of medium
gray for the rubber boots on the wheels. With that done, it was time to
weather.
For weathering I used a product called Rustall. This made the entire
weathering process much simpler than anything I've used in the past. Rustall
is a four-part set, with a rust bottle, a dead flat bottle, a black wash
bottle, and a dust bottle. On this kit 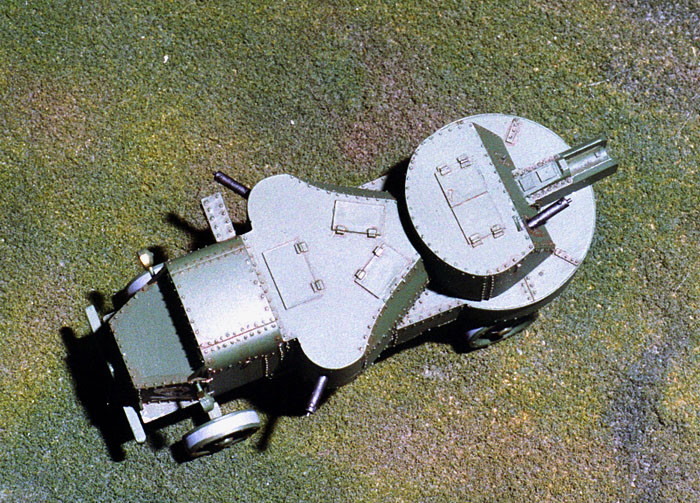 I
only used the first two, as I felt the black wash would be too harsh in
this scale and I didn't want the car coated with dirt. I started with
my fine brush, dipped in the rust mixture. By dragging down the sides
of the car and along the edges of the rivets, I ended up with a very nice
looking rust effect. I really don't know if I did too much or not enough,
as the photos of the Putilov-Garford aren't clear enough to show how it
weathered.
I
only used the first two, as I felt the black wash would be too harsh in
this scale and I didn't want the car coated with dirt. I started with
my fine brush, dipped in the rust mixture. By dragging down the sides
of the car and along the edges of the rivets, I ended up with a very nice
looking rust effect. I really don't know if I did too much or not enough,
as the photos of the Putilov-Garford aren't clear enough to show how it
weathered.
Once the rusting was done, I went back with Testors Metalizer paints and chipped sections. I used the Titanium color instead of aluminum, as I wanted a dull metal look rather than shiny. At this time I also painted up the three machine guns and fitted them in place. I also put the lights on. The lights seem to be different for every car in the photos I've seen. Some had four, some had two, and the one I did had three. I painted them up, again using Testors Metalizer paints, using Burnt Metal for the lens area, surrounded by a Titanium ring, and a Brass support bracket. The rest was painted French Khaki and a drop of Future was put over the Burnt Metal for the lens.
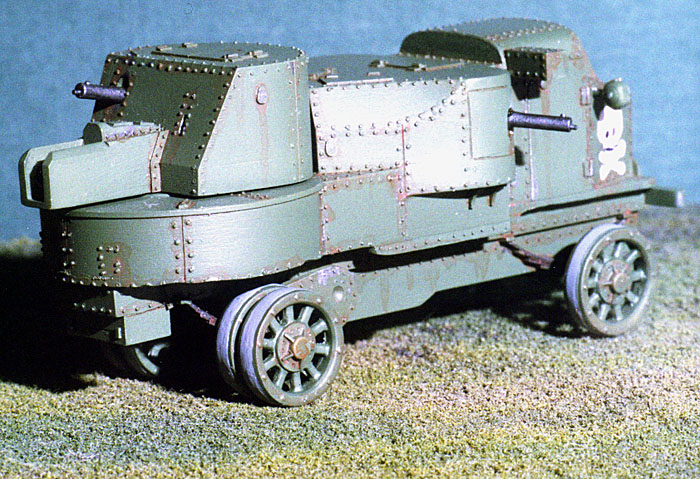
 With
all the details done, I turned to getting the wheels on and finishing
things up. The rear wheels went on easily, sliding onto the axle with
no problem. The front wheels were a bit more tricky as they didn't have
any kind of axle sticking out and there wasn't enough room in the main
piece to drill a hole for one. I used lots of CA to make sure they stayed
in place, but even then one popped off while I was photographing it. If
I was to do this again I would probably rebuild the front axle a bit to
give it a stronger attachment point.
With
all the details done, I turned to getting the wheels on and finishing
things up. The rear wheels went on easily, sliding onto the axle with
no problem. The front wheels were a bit more tricky as they didn't have
any kind of axle sticking out and there wasn't enough room in the main
piece to drill a hole for one. I used lots of CA to make sure they stayed
in place, but even then one popped off while I was photographing it. If
I was to do this again I would probably rebuild the front axle a bit to
give it a stronger attachment point.
Conclusion
This has to be hands down the simplest resin kit I've ever seen. My building it in three weeks is a strong testament to that statement, and as such it would be an ideal introduction to building resin kits. The basic construction and flat mating surfaces give a great feel for the material without having to deal with a lot of complex shapes. It's also a great diversion from other areas of modeling, and definitely adds a bit of uniqueness to the modeling shelves.
My sincere thanks to Roll Models for the review kit. Check their website today for any one of the Modelkrak armored cars.