
This article originally appeared in the December 2000 issue of Internet Modeler.
 Building
the Flashback Sopwith 1 1/2 Strutter
Building
the Flashback Sopwith 1 1/2 Strutter

By Chris Banyai-Riepl
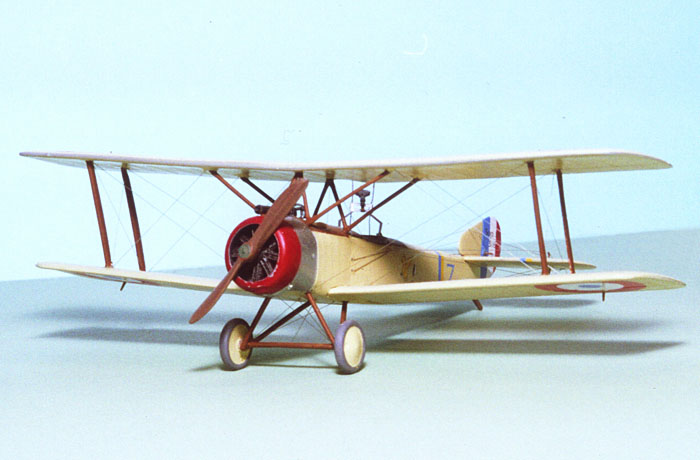
The arena of World War One modeling has experienced a surge in quality kits in the last few years, mainly out of Eastern European companies. The Flashback Sopwith Strutter kit is an example of these new kits, and what a great kit it is. Since its release the Ukranian company Toko has also come out with Strutter kits (now released under the Roden name), but in terms of total detail the Flashback kit is still tops. With plenty of resin, brass and plastic, I could tell that this wouldn't be a quick build but it would be fun. Like most kits, I started with the cockpit.
The Interior
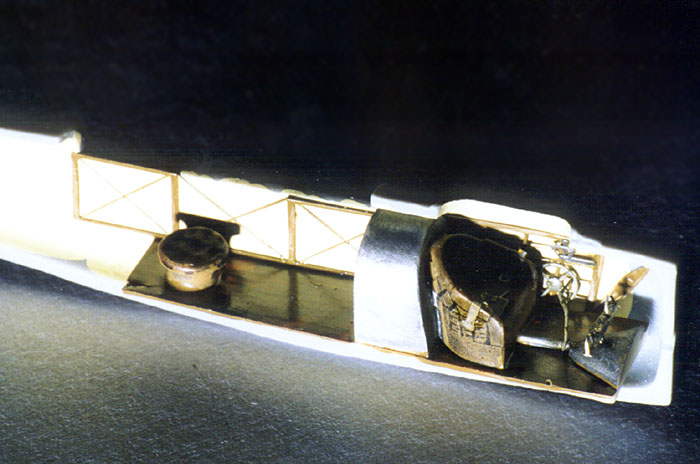
The cockpit of this kit is very impressive, with resin and brass making
up the entire interior. With fine etched brass sidewall detailing and
resin cockpit floor & seats, I could tell that I was in for some fun
painting. My first step was to paint the fuselage sides the interior
color, which in this case would be clear doped linen, as that was the
 overall
finish of the French plane I wanted to do. I used Humbrol's Linen for
this color. While that was drying I turned to the brass and resin parts.
Since the interior structure of the cockpit was mainly wood, I painted
everything a nice wood base color. When that was dry I went back with
a darker shade and painted on grain with a fine brush. By keeping the
paint thin I ended up with some nice looking wood.
overall
finish of the French plane I wanted to do. I used Humbrol's Linen for
this color. While that was drying I turned to the brass and resin parts.
Since the interior structure of the cockpit was mainly wood, I painted
everything a nice wood base color. When that was dry I went back with
a darker shade and painted on grain with a fine brush. By keeping the
paint thin I ended up with some nice looking wood.
With the basics painted, I then turned to the details. The tank behind
the pilot's seat was painted aluminum, along with the rudder pedals.
The instrument panel received wood treatment and the transparency was
attached behind it. The seat was painted a wicker color, then the seat
belts were added. Once all this was together I glued the 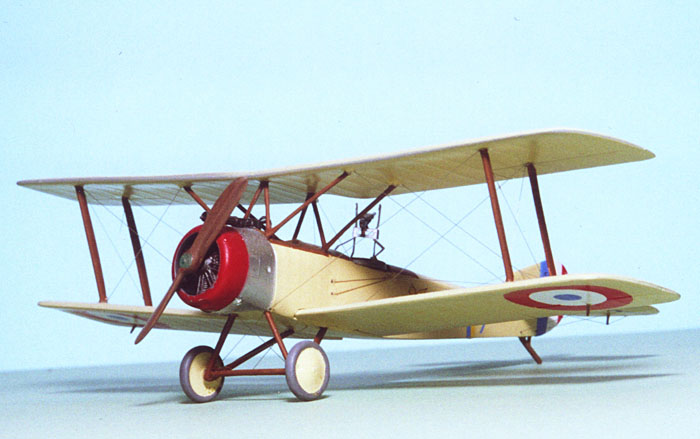 cockpit
floor into one of the fuselage sides. At this point I started to see
a potential problem. While all of this intricate detail looks nice in
the box and in the fuselage halves, once the fuselage is together the
front cockpit is difficult to see. By the time the top wing is added
and the rear gun mounted, nearly everything I just spent several weeks
on would be invisible. Oh, well, at least I know it's all in there.
cockpit
floor into one of the fuselage sides. At this point I started to see
a potential problem. While all of this intricate detail looks nice in
the box and in the fuselage halves, once the fuselage is together the
front cockpit is difficult to see. By the time the top wing is added
and the rear gun mounted, nearly everything I just spent several weeks
on would be invisible. Oh, well, at least I know it's all in there.
After taking a photo of the innards to prove years later that everything is there, I closed up the fuselage. To make maximum usage out of the kit Flashback provided several different covers for the rear office. Since I was doing the French two-seater, I chose the proper piece and fit it in place. After a bit of dry fitting and careful cleaning up I managed to get it to fit perfectly, not needing any filler. In fact, the only place I needed any filler was on the bottom of the fuselage where I wasn't paying attention and managed to nick a chunk out.
 Major
Assembly
Major
Assembly
With the fuselage together the next step was the flying surfaces. The tail was simple, needing only a little cleanup around the edges. After that was done I set them aside and turned to the wings. It was here that I had the most problems. The molds of my kit had some blemishes in the fuselage lower wing root area, needing some careful work with a knife and a file. Even if it was perfect there isn't much there to give a strong connection, so I ended up drilling holes in the wings and fuselage and pinning the lower wings in place. To make sure that the wings were at the proper dihedral I used a simple jig, made easier by the flat fuselage bottom. Once the lower wings were in place I glued the tailplane & rudder in place and set the main assembly aside to work on the rest of the kit.
 What
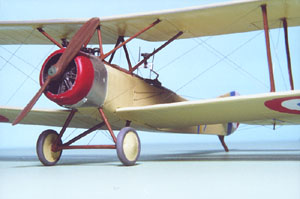
was left was the landing gear, struts, engine and propeller. Starting
at the front, I drilled a hole in the propeller and centered a shaft.
I then drilled a hole in the resin engine to accept it and started painting
both. The propeller received my usual two-tone wood treatment, with a
steel-colored prop boss, while the engine was done in black, dark metal
and aluminum. While I had the engine out I test fitted the cowling and
discovered that I needed to trim a bit out from inside. Once I got a
good fit I attached the engine to the fuselage and fitted the cowling
over it. I needed to do some light sanding around the seam, but otherwise
it was a good fit.
What
was left was the landing gear, struts, engine and propeller. Starting
at the front, I drilled a hole in the propeller and centered a shaft.
I then drilled a hole in the resin engine to accept it and started painting
both. The propeller received my usual two-tone wood treatment, with a
steel-colored prop boss, while the engine was done in black, dark metal
and aluminum. While I had the engine out I test fitted the cowling and
discovered that I needed to trim a bit out from inside. Once I got a
good fit I attached the engine to the fuselage and fitted the cowling
over it. I needed to do some light sanding around the seam, but otherwise
it was a good fit.
The struts needed a bit of cleanup, but mainly what I wanted to do was make sure they were all the right length. The W struts off of the fuselage needed the most work and I probably could have done a lot more work to them. The wheel struts were fairly simple and I painted up the wheels at this time. With all these assemblies set aside, it was time to lay down paint.
 Painting
& Decalling
Painting
& Decalling
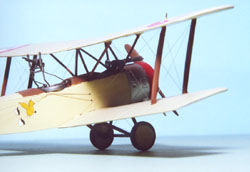
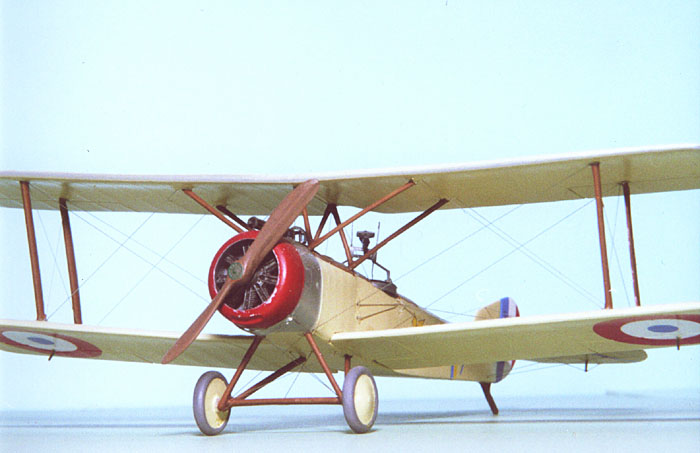
I painted everything with Humbrol Linen, making sure I had a nice even coat everywhere. With this paint being semi-gloss it took a bit longer to dry. I left it alone for a couple weeks, then masked off the metal panels on the front fuselage and sprayed them with Alclad aluminum. The final painting step was to mask everything off and spray the cowling red. With everything painted, I left it alone for another couple weeks to make sure it was all dry, then sprayed it with Future to prep for the decals.
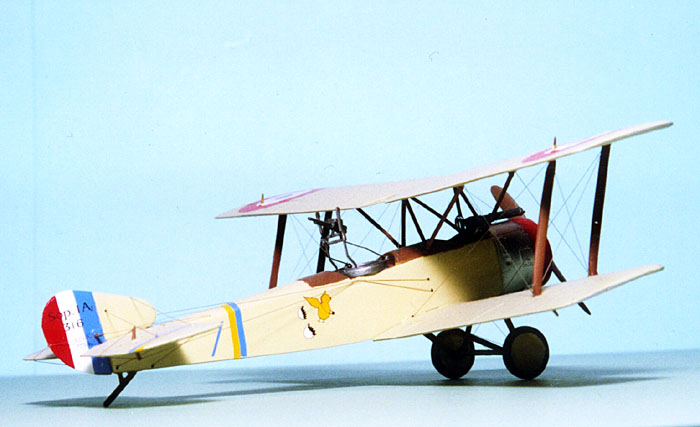
The decals, printed by Propagteam, were very nice and I had no problems with them at all in application. The only issue I had was in getting the rear fuselage stripes down right. There wasn't enough decal to go around where the instructions showed, and if I moved it back too far it was no longer vertical. My solution was to get it looking right on the top and sides and touch it up on the bottom. Once I had all the markings on, I sealed everything with a semi-gloss finish, then set it aside for a while to dry nice and hard. As soon as everything was dry, I attached the upper wing and wheel struts, taking care to make sure everything was properly aligned.
 Rigging
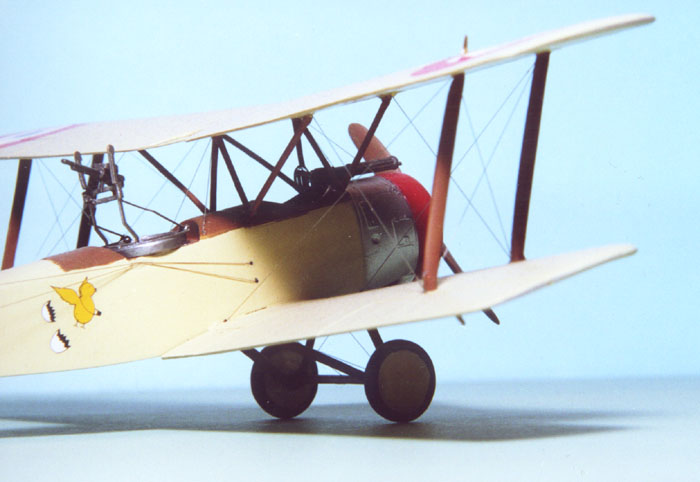
Rigging the Strutter was made much easier by the nice rigging instructions included. By following these closely the job was made much easier than it could have been. I rigged this plane with invisible thread run through #80 holes drilled in the proper places. In retrospect I should have drilled much smaller holes, as the #80 ones were way too large and took a lot of work to cover up once the rigging was done. Also, the one trouble spot with rigging a Strutter is the elevator wires. These leave the fuselage just behind the pilot's seat and run outside the fuselage until the observer's opening, where they return to inside the fuselage for a couple inches, then exit again and head out to the elevators. This makes things difficult in rigging unless you plan ahead (which, of course, I didn't). The other nice thing about the Flashback kit is that all the control horns are provided in etched brass, resulting in a very scale appearance.
With all the rigging done, it was time to add the remaining little bits. The wheels were glued on and the propeller fitted in place. The observer's Lewis gun was fitted into the French Nieuport ring (bent up out of the etched brass pieces) and the forward-firing Vickers was put in place. The last step was to paint up the tail skid and my Strutter was finished.
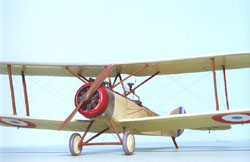
Conclusion
Building this kit was a lot of fun and while it isn't one I'd recommend for first-time biplane builders, it definitely is one to try for a second or third. There has been lots of interesting color schemes applied to Sopwith Strutters so there's plenty of choices out there.