
This article originally appeared in the December 1999 issue of Internet Modeler.
 PEGASUS Armstrong Whitworth FK8 'Big Ack"
Kit # 4007 1/72 scale
By Dennis Ugulano
A brief history
The Armstrong Whitworth FK.8 was designed by the innovative Frank Koolhoven, thus the FK in late 1916, with the aircraft entering service in early 1917. It was a sturdy aircraft, and well liked by its crews. Although only five squadrons on the Western front were equipped with FK.8s, of the 19 Victoria Crosses awarded to airmen in WW1, two went to crews of FK8s.
 1,701 FK8s were built; 751 by Armstrong Whitworth and 950 by Angus Sanderson.
Standard engine was the Beardmore 160hp six-cylinder water-cooled inline
driving a two-blade wood prop. Experimental engines included the 140-hp
RAF.4a twelve-cylinder air-cooled engine and the 150-hp Lorraine-Dietrich
twelve cylinder water-cooled engine.
1,701 FK8s were built; 751 by Armstrong Whitworth and 950 by Angus Sanderson.
Standard engine was the Beardmore 160hp six-cylinder water-cooled inline
driving a two-blade wood prop. Experimental engines included the 140-hp
RAF.4a twelve-cylinder air-cooled engine and the 150-hp Lorraine-Dietrich
twelve cylinder water-cooled engine.
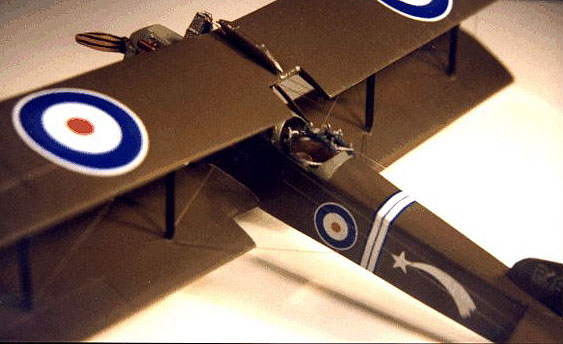
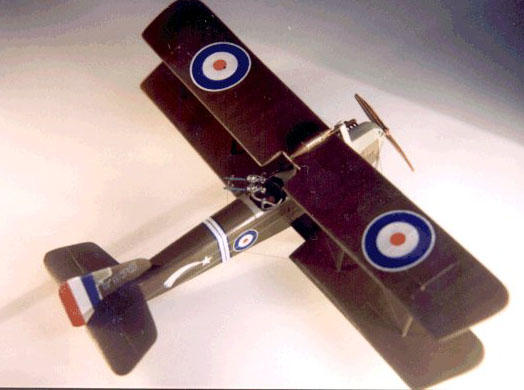
The plane had a 43'6" wingspan, carried one fixed forward-firing 0.303 Vickers and one or two Lewis machine gun mounted on a Scarff ring in the rear cockpit.
The FK8 saw service with five squadrons on the Western Front, plus the Headquarters Communication Squadron, three Home Defense Squadrons and also served in Macedonia, Palestine and India. It was withdrawn from active service in early 1919, ending its career as a trainer.
CONSTRUCTION
 Before I get into the construction of the model, there is one very important
point to make in the construction of a Pegasus kit. The sprue attachment
points are heavy and the plastic is soft. I highly recommend that the
parts be cut off with a razor saw leaving a little of the sprue behind,
then sand the part with your choice of sandpaper. This is especially true
with the leading edges of the wings.
Before I get into the construction of the model, there is one very important
point to make in the construction of a Pegasus kit. The sprue attachment
points are heavy and the plastic is soft. I highly recommend that the
parts be cut off with a razor saw leaving a little of the sprue behind,
then sand the part with your choice of sandpaper. This is especially true
with the leading edges of the wings.
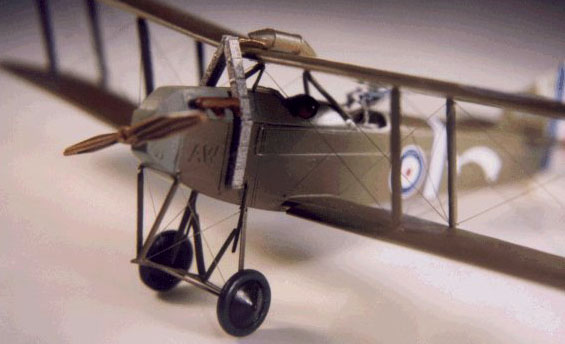
Construction began with some minor dremel work in the cockpit especially near the cockpit openings. This kit is thinner than some Pegasus kits. A knife around the cockpit openings followed by a light sanding of the fuselage halves on a piece of flat sandpaper and the fuselage is ready for building.
The interior is very straightforward. The floorboard and bulkheads were painted Testors Wood. Using Datafile 64, the interior can be superdetailed to the modeller's content. The instrument panel and control column was added and the fuselage was closed. All of this work disappears under the top wing but at least the modeller will know it is there. The only thing I added was a seat for the observer. As with most Pegasus kits, considerable sanding and filling is required to get a seamless model. I used Tamiya putty and Gunze Sanyo Mr. Surfacer to accomplish this.
 The top wing is in two pieces and has about a 2-degree dihedral. Sand
the two surfaces lightly as they are already set up for the dihedral.
Using Testors glue, the wing halves were glued, a weight set in the middle
and the dihedral set, measuring each end for accuracy. This is then set
aside for a day to dry. When dry, a minor amount of putty and sanding
was required to eliminate the seam. When the radiator reservoir is added
it will hide any imperfections that may remain.
The top wing is in two pieces and has about a 2-degree dihedral. Sand
the two surfaces lightly as they are already set up for the dihedral.
Using Testors glue, the wing halves were glued, a weight set in the middle
and the dihedral set, measuring each end for accuracy. This is then set
aside for a day to dry. When dry, a minor amount of putty and sanding
was required to eliminate the seam. When the radiator reservoir is added
it will hide any imperfections that may remain.
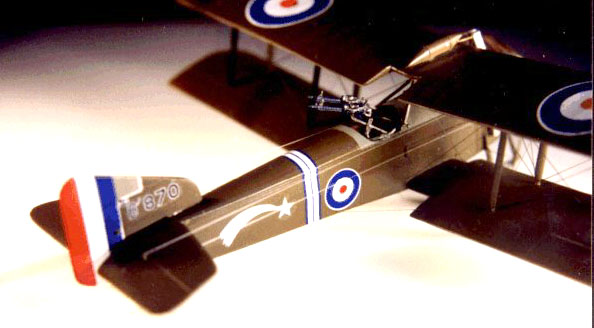
The tail surfaces require almost no work other than clean up and that is minor. I do paint and decal all sub-assemblies.
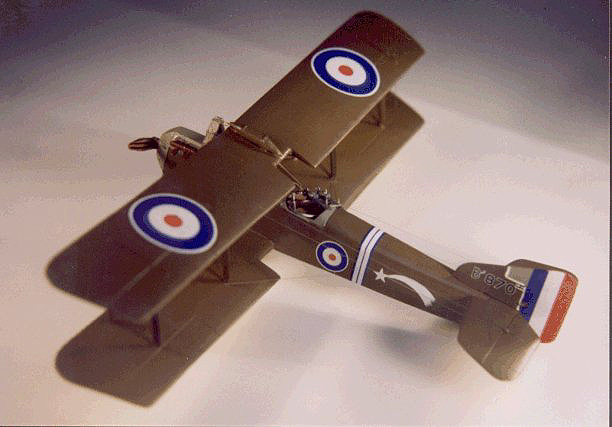
The most critical part of the model is the mounting of the lower wing. Logically, it must match the dihedral of the upper wing for the struts to fit. Again using Testors glue, I butt join the wings to the fuselage and set the dihedral. After making sure the two wings match, it is set aside for a day. When dry, a bead of CA is run along the seam for a little more strength.
 After the wing is correct, I attach the tail surfaces and landing gear
I like to get my model on its wheels as soon as possible. The metal
tailskid and main landing gear support are then attached. The only flaw
I found in the kit was the front "V" for the landing gear extension. This
extension is parallel with the ground according to the DATAFILE. This
"V" is too short, causing the extension to be at a pretty sharp upward
angle. This was replaced with plastic rod of sufficient length to allow
the extension to be parallel. Rigging is added before I attach the wheels
so I don't have to work around them later.
After the wing is correct, I attach the tail surfaces and landing gear
I like to get my model on its wheels as soon as possible. The metal
tailskid and main landing gear support are then attached. The only flaw
I found in the kit was the front "V" for the landing gear extension. This
extension is parallel with the ground according to the DATAFILE. This
"V" is too short, causing the extension to be at a pretty sharp upward
angle. This was replaced with plastic rod of sufficient length to allow
the extension to be parallel. Rigging is added before I attach the wheels
so I don't have to work around them later.
The model is now at the point where all rigging holes should be drilled in the wings, fuselage and tail surfaces. The rigging of this plane is pretty simple, so there is not a lot of rigging holes to be drilled.
 Now attach the top wing. I use Testors glue because it will not set for
quite some time. All eight struts are mounted in their holes in the lower
wing. All struts are drilled and painted prior to this stage. Then, with
the model upside down, the struts are mounted on the top wing. After the
glue dries a short while, it is flipped over and the alignment is checked.
When it is correct, the model is immobilized with balsa wood and straight
pins until it is dry. I add the cabanes last and cut each one individually.
This adds the final strength and alignment to the top wing.
Now attach the top wing. I use Testors glue because it will not set for
quite some time. All eight struts are mounted in their holes in the lower
wing. All struts are drilled and painted prior to this stage. Then, with
the model upside down, the struts are mounted on the top wing. After the
glue dries a short while, it is flipped over and the alignment is checked.
When it is correct, the model is immobilized with balsa wood and straight
pins until it is dry. I add the cabanes last and cut each one individually.
This adds the final strength and alignment to the top wing.
At this stage, the model is complete for rigging. I use the DURAS method and as mentioned earlier, this is a very easy model to rig. The control lines are added and the rigging is complete.
Now I add all of the small parts that can get hung up in the rigging. The wing mounted radiator reservoir, the observer's guns, radiators, exhaust and prop are all added. With that the model is complete.
 As mentioned earlier, I paint sub-assemblies, gloss coat and add decals
as I go. When the kit is assembled, a gloss coat of Testors Gloss is used.
Dull Coat can be applied to any part that should be flat.
As mentioned earlier, I paint sub-assemblies, gloss coat and add decals
as I go. When the kit is assembled, a gloss coat of Testors Gloss is used.
Dull Coat can be applied to any part that should be flat.
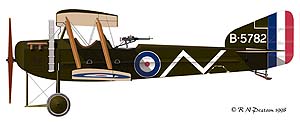
The model is painted to match the top picture of the back page of DATAFILE 64. The decals are from the kit. Pegasus decals do not require any setting solution. They are thin and contour to all surfaces on this kit. For an added touch of realism, wrap some thin tape around the struts and paint them PC10. This tape is very visible in the reference photograph.
A nice kit when completed, it took about 20 hours from start to finish. It fills a gap in the British two seaters and is a nice addition to any collection. The kit sells for around $25 and is available from Rosemont Hobby, other outlets or direct from Pegasus. Remember that Pegasus only manufactures 1500 of each model and within a year, most are sold out.
CREDITS
Pegasus Models for producing the kit.
Barry Stettler at Rosemont Hobbies for providing the kit.
And we can't forget Bob Pearson for asking me to build it.